Sunday, September 25, 2011

product review: nail foils from kkcenterhk

I'm excited to review these nail patches/stickers/foils/wraps I received fromkkcenterhk to review.http://

I have no idea the proper name even though one says nail sticker and the other says nail patch because I know this product is also known as nail foil and nail wraps as well. In case you aren't familiar with these products it is an alternative to nail polish. They are decorative (or plain) foils that are applied to fingernails or toenails. They are hard to apply (atleast to me) and some salons do it as well since theyre more qualified.

There are nail foils that require t

he use of heat to apply, salons use a heat lamp but you can also use a hair dryer at home. Some even us it without the heat and there are some that just need water.

I totally forgot about the use of heat when I did this review. When I first heard about nail foils I watched a tutorial and one used heat while another just applied it and smoothed it out onto the nails. Anyway, this my first time using these types of products.

For this tutorial I used the design with the hearts.

1.)I first removed any previous polish I had on.
2.)Then chose the nail foil that was closest in size to my nail bed and cut it out.
3.)I removed the backing and placed the rounded corner on my nail bed.
4.) Gently smoothed the nail foil as much as I could without creating any bubbles.
5.) Cut off excess foil
6.) Filed gently in a downward motion to file the rest of the foil off.

And you're done! I wasn't too happy with the results. I was a bit too excited to try this and I did it while my kids were awake so you can imagine how that went. I rushed through it and didn't take my time.

It probably looks better in the pics because I tried to hide the flaws lol


To remove is easy. It says to wash off with warm water and soap. All I had to do was peel it off. No problems! Btw, this only lasted me a few hours! Everybody has different experiences though and I am no expert at applying these..yet.

Pros:
It def beats having to smell nail polish!
It comes in really cute designs (a plus for people who are not good at doing nail designs)
No drying time!
Easy, to a certain extent and based on your skills

Cons:
Contradicting myself a bit here, but it can be difficult to apply if you do not know what you're doing.
Doesnt seem to last too long

You can purchase these items at www.kkcenterhk.com or simply search nail foils or patches to see what else comes up. Sally Hansen also sells cute nail stickers as well!

DISCLAIMER: These products was sent to me for review purposes. Opinions are my own .

Saturday, September 24, 2011

Product Review: Nakia Amour - Untangling the truth about Natural hair

I am so happy to review some products I received as a sample from Nakia Amour(formally Kinky Knots). Here is a bit about the company:

Nakia Amour Natural Hair Care places the authority back into the hands of the consumer by providing quality hair care products that can be used at home or in the salon. Our products are made with gentle moisturizing ingredients and essentials oils to maximize growth, restore moisture and enrich the overall health of hair. Nakia Amour is a diverse product line and anyone that has dry, naturally curly, chemical or color treated hair can use this product line.

For more information about Nakia Amour please visit our webpage or join us on Face Book. Thank for this opportunity, we appreciate your time and consideration.

www.naturalkinkyandcurly.com
501-240-9045


For review I received the pre conditioning hair oil, black soap shampoo, moisturizing conditioner and curl enhancing gel.

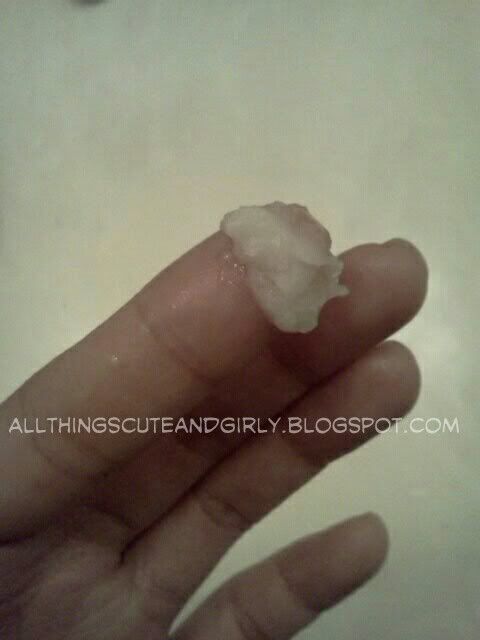
Nakia Amour Pre-conditioner Hair Oil $18.00

The Nakia Amour Pre-Conditioner Oil is for those battling dry hair.

Directions: Apply Pre-Conditioner Oil to dry hair and let sit for 45 minutes or longer. Water rinse then shampoo with Nakia Amour Black Soap Shampoo and rinse again. Condition with Nakia Amour moisture enriched conditioner.

The claim: Hair should be easier to detangle and show a noticeable difference in moisture, softness, elasticity and shine.

Ingredients: Organic Shea butter, Organic Coconut,Almond,Rosemary, Peppermint Oils and Germall. Note: Oil can be used as regular hair oil for extra conditioning as well as a relaxing foot balm after a hard days work. Remember to store at room temperature.

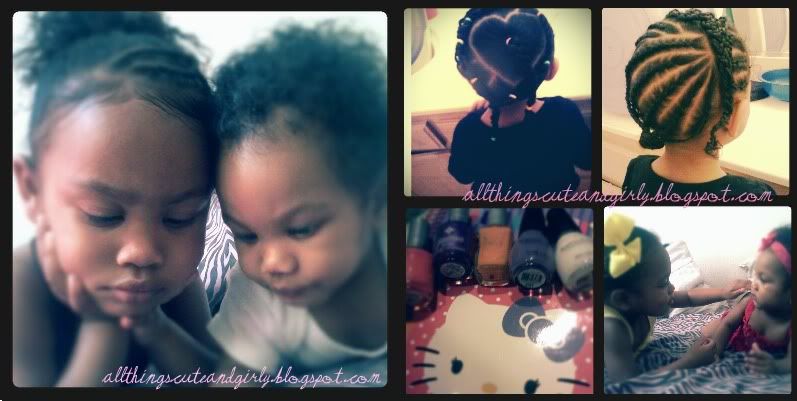
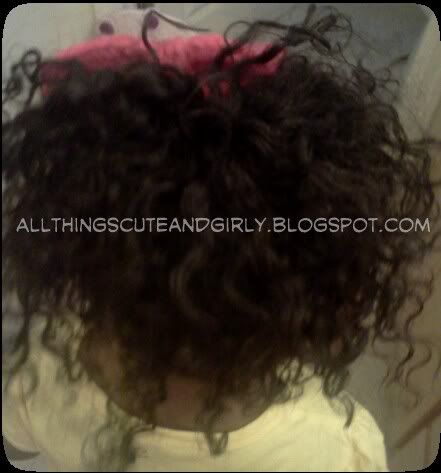
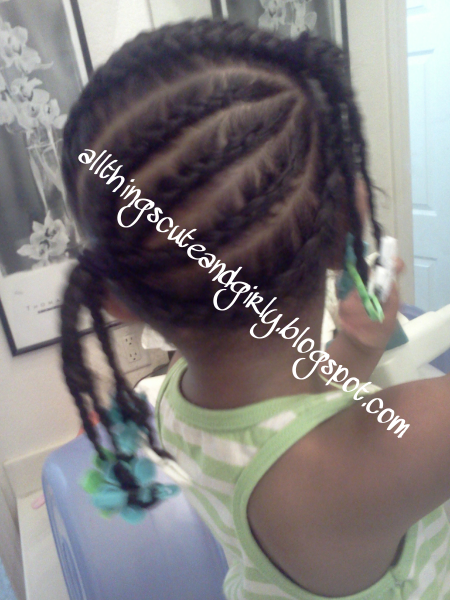
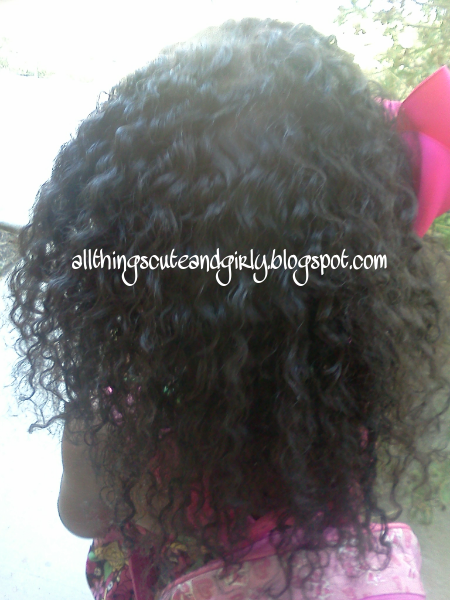
Our review: I love this stuff!!! When I first opened it I was a bit surprised because it said pre conditioner OIL, I was assuming it would be liquid. After, emailing Nakia she informed me that it should actually be pretty thick because of the ingredients. I later realized that was correct, and once in my hand it melted right into her hair. I also realized this pre conditioner oil was similiar to my shea butter mix I would use to saturate her hair with the night before her bath. I parted her hair.into small sections and applied from root to tip and let it sit anywhere from 30 minutes to an hour+. I love this product and the results it gives us. It makes her hair really soft especially after shampooing. I also like the peppermint in it, giving that light cooling, fresh effect. It also smells wonderful.

This product can also be used as a hair oil by applying to both hair and scalp for extra conditioning benefits and sheen throughout the week. I have only used it as a pre-conditioner but I bet it would work great as an oil as well. Overall, a definite 5/5!

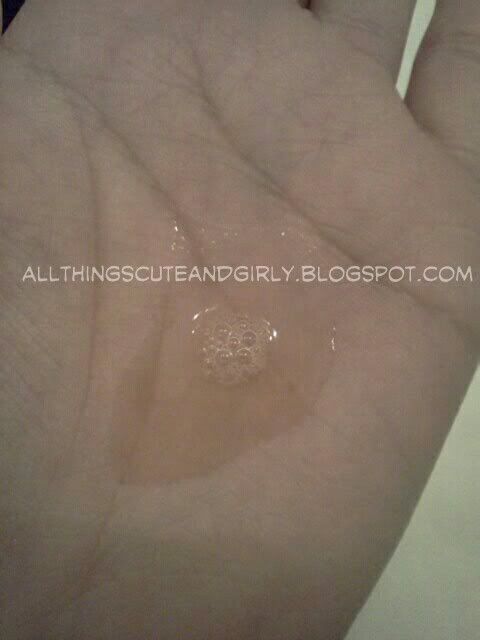
Nakia Amour Black Soap Facial Wash & Shampoo 12 oz. $16.00

The Nakia Amour Black Soap Facial Wash & Shampoo is a 2 & 1 cleanser that moisturizes without drying skin and hair.

Directions: Apply shampoo directly onto wet hair and massage gently until lather. Rinse out and proceed to condition.

Ingredients: distilled water, shea butter, cocoa pod ash, coconut oil, tea tree and germall. This shampoo is free of parabens, SLS, alcohol and fragrance.

A great solution for combo/oily skin, acne, dandruff and blemishes. Black soap has been used for eczema, psoriasis and dry/itchy scalp over the years and still works today! The 2 & 1 leaves skin feeling refreshed and hair soft & revived. SHAKE WELL.


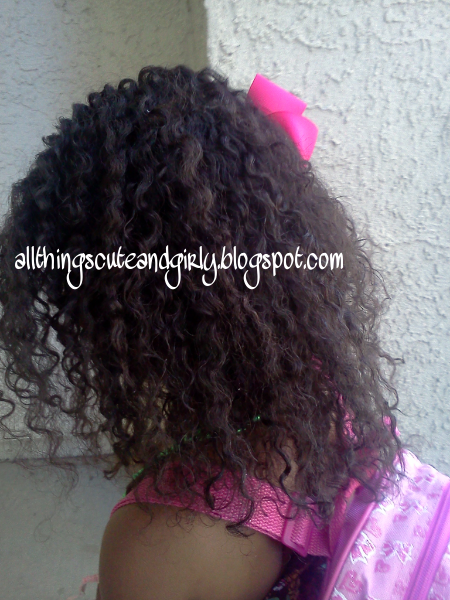
Our review: This is the first time using a black soap shampoo and I have always heard good things about it. So I was really excited to try this out. Since I have never tried black soap before and use to traditional shampoo, I was a bit surprised by the consistency and how liquidy it was. Regardless, this product did NOT disapppoint. I applied the shampoo after rinsing out the pre-conditioner oil. It left her hair really clean and shiny. It did not leave it feeling stripped at all. I really love this product. I have not used this product as a face wash but would love to try one day. Overall, another 5/5

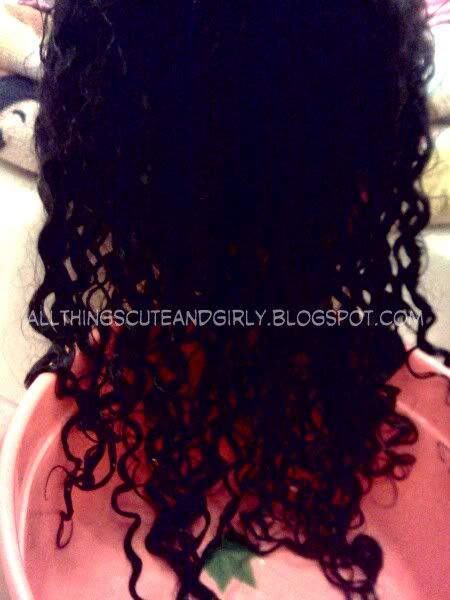
Nakia Amour Moisturizing Conditioner 8 oz. $16.00

The claim: A paraben, sulfate and silicone free moisture intense conditioner that leave curls moisturized, soft and manageable.

Directions: Apply moisturizing conditioner to hair after shampoo. Distribute evenly and leave on hair for 10 minutes. Detangle with widetooth comb and rinse. Gently blot clean hair with towel (do not rub). Leave hair damp and apply curl enhancing gel.

Ingredients: Water, Glycerin Stearate, Cetyl Alcohol (fatty alcohol derived from coconut helping the cuticle lie flat), Organic Olive oil, Jojoba oil, Avocado oil, Stearalkonium Chloride, Hydrolyzed Soy Protein, Quaternized Honey, Ivy Extract, Panthenol, Phenoxyethanol, Rosemary Extract, Behentrimonium Methosulfate (not a sulfate, derived from the rapeseed plant) Quaternium 87 & Sodium Lactate. Product is unscented.

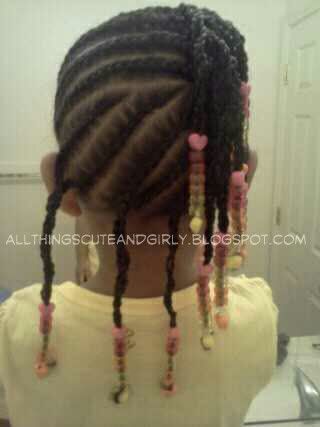
Our review: Another amazing product! I applied this to Leelee's hair after using the black soap shampoo. Right away I noticed the amazing slip this product gave her hair. Detangling with the widetooth comb was no hassle. It ran through her hair so effortlessly it was unbelievable! I am seriously in love. I have not used a conditioner that brought results like this before. I was a bit worried though because when I first rinsed it out her hair felt a bit squeaky/stripped BUT amazingly it got soft after drying. I guess her hair was just really clean. Overall, a 4/5

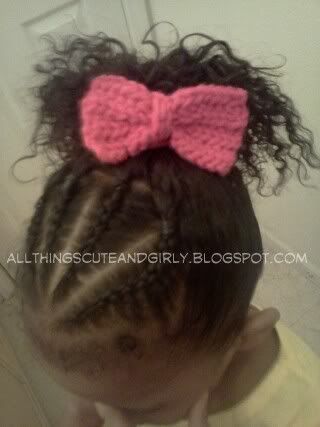
Nakia Amour Curl Enhancing Gel 4 oz. $14.00

The claim: Nakia Amour Curl Enhancing Gel leaves curls soft, hydrated and conditioned without the crunch. One of the best hair gels for soft to medium textures.

Direction: Apply gel to damp curly hair to enhance curl definition and tame fly-aways. Divide hair into small sections and evenly distribute gel to hair with wide tooth comb or Denman brush. Work gel into each section then allow gel to completely dry before styling.

Ingredients: Water Olive oil, Organic Camelina Oil, Castor Oil, Aloe Vera, Polysorbate 20, Polyquaternium 10, Sodium Lactate & Germall. This light weight gel works best on 2a, 2b, 3b, 3c curl patterns. Product is unscented.

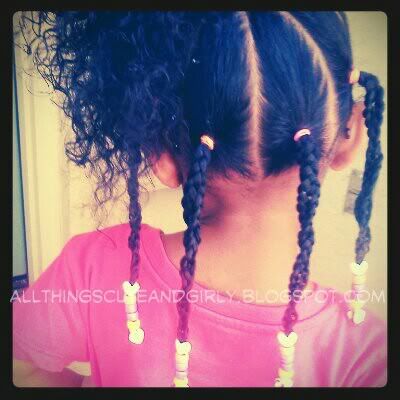
Our review: I cannot fully review this product because upon opening it and applying to her hair Leelee (or I) could not stand the smell! Its not awful its just something different we are not use too. Nakia informed me that the product is plant based and unscented. I'm not sure if it's the aloe vera or not but I couldnt apply it like I wanted on Leelee's hair because she was so bothered by the scent. Because the product was not fully applied like we should have our experience may be different.

Here is what I thought: After getting out the bath I got her hair sectioned and ready to apply the gel. I grabbed the bottom section and applied the product but that was as far as I got until she started to complain. The next day that section of hair was REALLY dry and tangled. I'm not sure if we didn't apply it right or it just didn't work for us, but I did not like it at all. It could also be because I didn't apply anything else. Usually, after getting out the bath I seal with coconut oil. Later, I tried again. This time I applied coconut oil to seal, a bit of Bee Mine luscious on top and then some of the gel later. This worked better for us but still wasn't in love with the results. Overall, 2.5/5

Our review on the entire line: LOVE and highly recommend. This is the first time using a line and all their products step-by-step. I am pleased with the results . The only thing I'm not too ecstatic about is the price. They are a bit pricey for the sizes offered. It is understandable though because everything is handmade. When I have extra funds to scrape up I would happily purchase the above products (minus the curl enhancing gel). Overall product line 4/5


Nakia is generously offering Allthingscuteandgirly readers the chance to save 10% when you spend $25 or more by using Promo Code :FallCurlz. All you have to do is type it in the note/special note section.

Please check out Nakia Amour at
www.naturalkinkyandcurly.com

"To get the most out of your hair turn to someone who cares"

DISCLAIMER: Products were sent to me for review purposes. All opiniond are honest and my own.

Friday, September 23, 2011

cute girl hairstyle: easy, simple braids with ponytail

Products used: crocheted headband, rubberbands (dipped in olive oil), bobby pins, rat tail comb (for parting), boar brush, Queen Helene royal curl curling cream, Eco Styler gel, Bee Mine luscious balanced moisturizer

For this cute girl hairstyle, I first parted the hair from ear to ear. I sectioned off the top half and made four cornrows and secured it with a rubberband (dipped in olive oil to prevent breakage when removing).

I then randomly parted sections in the back to braid. I had about 6-8 braids total. Each braid was moisturized with Bee Mine luscious balanced moisturizer and then heavily coated with QHRCCSC. I did this because I wanted a nice braid out for the back. I left it in for a few hours and when I removed it, the braid out was wonderful! I wish the pics really showed how great it looked but it didnt get captured esp since I had to put it into a pony.
Initially I wanted the four cornrows and then the braidout along with the crocheted headband but it didnt work out. The bow wouldnt work with me so I decided to improvise and do the ponytail and just wrap the headband around her pony to get the final look.
I wrapped the headband around her pony and bobby pinned the bow so it would stay in to place. I then used Ecostyler gel to slick down her sides and used a boar brush to get the pony smooth.

Cute and easy girl hairstyle!

Tuesday, September 20, 2011

half braided mohawk to the side and twisted

she did not wear the style like this. I just moved the bottom braids to the back to show what was done. It looks funky like this but the bottom braids were pulled to the side thats why it was parted diagonally.

Let me start off by apologizing for the lack of posts lately. I know I've been slacking. Also excuse the weak post titles. Im obviously not good at naming styles.

I did this style about a week and a half ago and really enjoyed the outcome of it. If you do not know already, I LOVE mohawks. It is def our go-to style when I draw a blank on what to do. I have always wanted to do a mohawk that fell to the side. Here is what we came up with. On clean, detangled hair these are the steps I took to achieve this look.

Products used: shea moisture curl enhancing smoothie, eco styler gel, widetooth comb, pintail comb (for parting), rubberbands dipped in olive oil (for beads and causes less breakage when removing).
1.) I parted the hair in half from ear to ear and tied the bottom half off.
2.) I parted a section in the front to braid two cornrows as bangs and lay on the left side (opposite of the way I wanted the mohawk to lay).
3.) I then made a part on the right side of the top portion of the hair so that the mohawk would be right sided instead of straight down the middle.
4.) I had about a total of seven braids per side when I was done. The braids were pretty skinny and since I was going to be adding beads I did not want to weigh each strand down with it so I decided to grab braids across from eachother and twist them together. I did the same with the bangs. This made the strands thicker and I felt better about adding beads to it.
5.) For the remaining bottom section I made six braids diagonally. I did the same to these as well by twisting two braids together.

Saturday, September 17, 2011

cute girl hairstyle: easy braids

easy braids


Isn't this style adorable?


Read below to see how we achieved this easy style which includes just braids!

1.) Start on clean, detangled hair.
2.) Part hair in half from ear to ear and tie off the top section.
3.) Part the bottom portion in half vertically so that you have two even halves.
4.) Start with one section and part it in half again diagonally to form the above look. Repeat with the other side. Tie each individual (should be four) section with a rubberband (dipped in olive oil to cause less breakage when removing) or ouchless ponytail holders.
5.) Separate an individual section into two even sections. Braid each section and then twist around eachother. Then tie off with a rubberband. Repeat with all sections.
6.) Return to top section and properly fix to your liking.

 cute girl hairstyle

excuse the scalpy look, the way I edited the pic made it look this way -__- I promise its not like that, really!


And you're done! Its that easy! Its an easy style!, easy braids! Since we were in a hurry and needed a quick style I chose to leave the top part in just a cute ponytail puff. If you have extra time you can do the entire head with this look. As you can see we also accessorized the ends with beads. You can choose to leave it plain, add beads, barrettes or both! Anything will look cute with this style. I love how this is a really easy style and doesn't require much skills so ANYBODY can do it. Its just simple braids twisted together to create this cute girl style.
 cute girl hairstyle

Wednesday, September 14, 2011

Mohawk and twists on natural hair for kids

For this month's hair carnival, we were paired up with a partner and both recreated a style from one another. My partner was the wonderful Charlotte over at Charlottes Avenue. This girl has flat twists DOWN! This is the style I chose to recreate. It is a mohawk with twists.
To see our original post on this style with more pictures and info you can view it at Snagged Style: Charlotte's Avenue

I couldn't choose just one style to recreate because there are so many talented mommy's out there. Another style I chose to do was from Mainly Braids.
To see our original post on this style with more pictures at Snagged Style: Mainly Braids
Here is another style I recreated Snagged Style: Keyative Styles. Fan Feature from someone else that is similar to the style from Mainly Braids. To see the GORGEOUS braid out from this style view our post onThe first best braid out we have had


If you enjoyed these looks you can also view more of our mohawk styles and variations by viewing these posts:natural mohawk switched up, 4-in-1 mohawk style variations
, hereand here.

I hope you enjoyed this post for this month's carnival as much as we did! (:


Tuesday, September 13, 2011

cute cheetah nail design

cute cheetah print nail design
Nail polishes used: Sinful Colors Snow me white, Sinful Colors Seaweed and Sinful Colors Verbena. For this look I painted my middle finger with Sinful Colors Snow me white, the index and pointer Sinful Colors Seaweed and pinky and thumb Sinful Colors Verbena. I painted 2 coats of each polish . To get the cheetah look I randomly dabbed spots of Sinfulxj Colors Seaweed and Verbena and then drew random black half circle around the dots. I also filled in the empty spots with some black circles. To finish it off I added a silver rhinestone in top of one of the spots (:

cute cheetah print nail design

Monday, September 12, 2011

criss-cross braids and layers

I had no style in mind when I came up with this and I'm happy with the way it turned out. This was also the first time doing layer braids.
The back was done in 2 layers of braids going sideways with beads at the ends.
this was the top tied off.
the ends were finished off with two 3-strand twists. These pics were done a few days later and the 3-strand twists were falling apart :(

Saturday, September 10, 2011

pink ombre nails, anyone?

Nail polishes used: Wet n Wild clear coat, Jordana pink hearts (clear with pinkish glitter and heart specks), Jordana soft pink, Sinful Colors soul mate, Jordana creamy fuschia, L.A girl matte hot pink.


There was/is a trend of ombre hair going on. If you have not heard of ombre hair, it is where your hair gradually goes from dark (roots) to light (tips). More info and pics here.

There has also been a new trend of ombre nails. Here's my take on it. Enjoy! (:

in sunlight


Btw, yes I'm trying to get fancy with the necklace! Lol it may be my signature look for designs. What do you think? Would you rock this?


DISCLAIMER: All products have been purchased by me with my own money.

Friday, September 9, 2011

sinful colors seaweed

I really need to invest in a good camera soon because these pics don't do a good job at showing the true colors of each polish. This is two coats of Sinful Colors seaweed. This color is very unique to me. I love colors that are odd and I don't see much of. This one caught eye. At first glance it does look like a seaweed/minty color but when I applied it, the color has a grey undertone to it. It just really depends on the lighting. Here is the color against a bottle of Suave almond+shea butter shampoo bottle to show the color.

Thursday, September 8, 2011

Avanti Ultra flat iron review from Flat Iron Experts

I am so excited to do this review. Today I am reviewing the Avanti Ultra flat iron from Flat Iron Experts.

Prior to this flat iron I only have owned two others that were more high end and expensive. My first expensive flat iron was a Chi. It was a gift for graduation from my mom because I was always borrowing hers. At the beginning, I LOVED the Chi, it was nothing like I have ever used before (I have used con air or Mary-Kate and Ashley type ones). I also didnt straighten my hair a lot before because my hair is really straight to begin with. But as I was experimenting with coloring my hair and cutting it, it got damaged and was no longer as straight. Anyway, about 2 years later my Chi just broke! I was devastated. I went out to search for another and ended up buying the Corioliss Pro, which is what I currently use. I remember seeing it at the stands at the mall and someone even used it on me once. At first, I wasn't use to using this type because it didn't seem to run as smooth as the Chi did through my hair. It would get snagged but eventually I learned to work with it and it does its job.

NOW, with this Avanti flat iron I think I have been sold. I have never owned a flat iron that has titanium ceramic plates. This flat iron seems to glide through my hair so effortlessly. It also heats up really fast.

Here is my hair after using this product
Here are the pros: heats up fast, swival cord, glides effortlessly through hair, no frizzies, leaves my hair shiny and silky, has digital display and controls to control heat, heats up to 430 and cuts down style time.

Cons: there's nothing really bad about this flat iron. The only thing about it was that I was having a hard time trying to turn it on. Like a dummy I kept pressing the power button and when it wouldnt work I thought it was broken. I later found out I had to hold the power button until it turned on, same goes for turning it off. Another thing is that I haven't mastered crimping with this flat iron. Because the plates are so smooth and just slides through my hair its difficult for me to get it to crimp. I'm not sure if its just me but that is what I am experiencing.

For more info on this flat iron click here

Here is some curls I got from using this flat iron
Besides the flat iron I also tried out a new heat protectant, the KQC thermal shine. Here are the pros and cons:
Pros: has a nice smell similiar to cologne, leaves hair with a nice shine.
Cons: I don't like how its in an aerosol can. And although I like the smell its a bit too overpowering at times.

Stop by the Flat Iron Experts to check out more of their items.

DISCLAIMER: I was sent these products for review purposes. I was no compensated or paid for this review. All opinions are my own and my honest opinion .

the best braid out we have had so far..

The title says it all! We got this following braid out from this style. I am so happy with the way it turned out! After taking out the style all I did was lightly apply some kinky curly curling custard. I flat twisted the front portion, secured with a rubberband at the side and dressed it up with a bow (:

Tuesday, September 6, 2011

snagged style: keyative style's fan feature

This following style was inspired by one of Keyative Style's fan feature. I did not come out exactly like hers (especially the front) but I tried my best! I really loved the idea and decided to try it. Here is what we came up with
top
right side

left side
back view


Stay tuned for the gorgeous braid out we got from this style.

Monday, September 5, 2011

Born Pretty Nail Stamp Review & Haul

this design is the FIRST time using the stamper. As you can see, the thumb print is crooked and the pointer is barely there. It still came out cute!


I finally received my package from Born Pretty (really fast shipping considering it is all the way from Hong Kong.) I have purchased from Born Pretty before but it was through their Ebay store. I recently, found out they had a website and decided to try their nail stamp products.
here are the items that I purchased (click on the item to view and possibly even purchase!):
Dual double stamping nail art
stamper with scraper
$3.03
leopard and lace design nail art template $2.32
black and white nail art varnish for stamping$3.41
nail art template m81 $2.99
in total I spent $10.04
I used a discount code. To save more you can also use the code TTL73 from divalocks that offers an extra 5% off.They also ALWAYS offer FREE SHIPPING ANYWHERE.
Later I switched up the look and added rhinestones (also purchased through them on their Ebay store. I'm pretty sure they have it on their site as well.) For this look the following products were used
I used the black nail varnish to use with the leopard and lace nail template, the stamper and scraper, black rhinestones, a dotter to attach the rhinestones (purchased the dotter from them as well in a previous order), clear coat by Wet N Wild to attach the rhinestones and Sinful Colors Soul Mate as the base.

Now here is my review: It is very difficult for me to get the stamper to work correctly every time. Its a hit or miss for me and I have no idea why. I have read blog reviews and have seen Youtube videos of the stamper working fine. I still have a lot to learn. When I use the stamper sometimes either the image doesn't pick up all the way or stamp all the way. I have used my own polish AND the nail polish varnish purchased from them that is intended for the nail template. I have no idea what I am doing wrong! BUT when it does work, I love it! It is def an easy way to doll up your nails esp if youre like me and not talented or crafty at all when it comes to designing nails! I love that they offer VERY low prices and even offer FREE SHIPPING. I will keep working with it and update (:

Please check out Born Pretty right now!

DISCLAIMER : All products were purchased by me with my own money. All opinions are honest and my own

Sunday, September 4, 2011

Bee Mine Ayurvedic Herbal Bar review

photo from www.beemineproducts.com
Along with the Bee Mine Bee Lovely daily conditioner, I also received a sample size of the Bee Mine Ayurvedic Herbal Bar . I LOVE this stuff! This was the first time using a shampoo bar and I'm glad I had a good experience. Because it was a sample size it was smaller and possibly easier to work with compared to the full size. I also purchased their clarifying bar but still have not used it yet. This shampoo bar lathered up really easily and smells wonderful. Very herbal! I liked that it cleaned her hair thoroughly without feeling too stripped. It also left her hair shiny! It seriously is amazing. It is almost used up already and I will def be purchasing again and thankfully it is not too expensive!


I have also read that it is a great facial and body cleanser as well. By the time I read that info though the bar was already gone, plus I used it strictly for her hair and didn't break any pieces off. I wouldn't feel comfortable using it for anything else after it has only been used for her hair. When I do purchase again though I plan on breaking it in halves and using for hair, body and face and will review! Please check this product out at www.beemineproducts.com